Sunday, 31 July 2016

Gold and Roses


So proud to showcase my latest cakes. I'm especially happy with the gold spots and roses cake. Georgie and her mum Julie came to the tasting session where we discussed the cake design. They had a cake design in mind, so we tweaked the design to suit their wedding theme. It took a loooong time (4 hours!) to apply each and every little golden circle. I made these little cuties by painting a sugar sheet with the same gold as I'd painted the cake board. I sprayed the sheet with glaze to set the paint, and when dry I cut out each individual circle with a hole puncher. I purchased the puncher especially for this cake to get the right size. It also took a looong time to find the right size puncher! 

Each rose, blossom and leaf was made by hand. The rose petals were dusted with pink petal dust and painted gold on the edges.The blossoms were highlighted with gold and all the leaves fully painted gold for dramatic effect. 

I got feedback from mum Julie to say that the cake was a hit!

Here are some photos of other cakes I've made recently, and so proud of too:


Friday, 4 March 2016

Paw Patrol Cake!


I looooove this Paw Patrol Cake! 

I found it too busy at first- with everything looking cramped but in the end I think it made for a dramatic cake that the birthday boy loved.

I started off making the dogs in advance. I had to make 4 shades of brown for 4 particular dogs- it was not easy! I worked from the bottom up, starting with the bodies and front and back legs. I learned quite a few things from making these dogs, like dont attach the neck until the head is ready to go on. Because the necks had dried hard, and when they heads were ready to attach they were hard too, there was a bit of a gap between the neck and the head, which didn't look good at all. So I took off the necks with my exacto knife, and made new necks. Because they necks were still soft, the heads were pushed down a bit onto the necks and so there were no gaps this time. I had made the hats, badges and their special backpacks in advance, so I just glued them on. 

This is the sketch I drew that was approved by my customer.


Here is a photo of the tower after it was ganached.


Here is the tower, decorated after it was stacked on to the bottom tier. The legs of the tower were added after the tower was stacked.


The trickiest part of the tower was the slide that went around the tower. It took me two attempts to get it right. The first time I just used modelling paste. that just wouldn't work. The second time I decided to use gumpaste/flower paste. 

I rolled the gumpaste to a thickness of about 2mm and cut strips of about 1". I placed each strip onto a fat straw to dry into a U-shape. To stop the straws moving about I stuck it onto a tray with sticky tape. When they were halfway through drying (holding its shape but still flexible), and after fumbling about and 2 attempts later, it occured to me that it was best to cut it into lengths that fit each section of the tower: the sides, front and back. It got easier with this method but I still had a hard time trying to get them to go round each corner. I attached each piece of slide onto the tower, starting at the top and working my way down, using toothpicks to keep each piece in place. Here it is, all toothpicked up!!


I used the yellow strips to cover the joins between each piece of slide. Good thing it was part of the design anyway. The toothpicks left holes in the tower, so I covered them with white royal icing. Yay for royal icing!

The rest of the tower was made in advance. I used 4" and 5" cake drums for the underside of the viewing room. They were covered in sugarpaste in stages. I used a very thin cake card for the bottom part of the roof and covered it with sugarpaste on all sides. The top part of the roof and the telescope is all sugarpaste.

The only thing I would change (and I will, because I've got another order for this cake in two weeks!) is not to use Rice Krispie treats for the viewing tower as it was really heavy. I will also make the central dowel (a threaded rod) go all the way up to the viewing tower. In this cake, the threaded rod stopped just before the top of the body of the tower, so there was little support for the viewing tower and roof. 

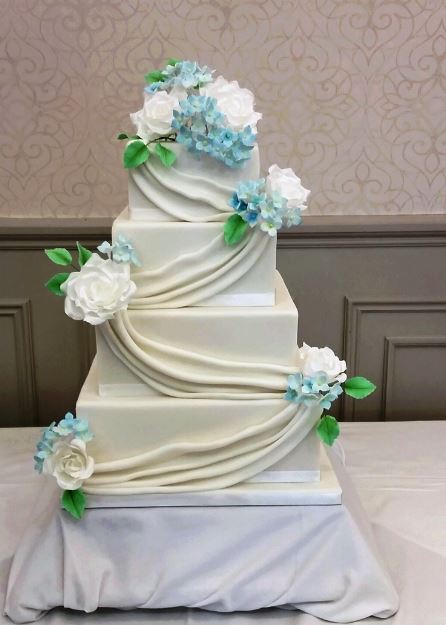
Next post- My White Wedding Cake Promotion!

Lots of Cakes!


So it's been a busy few weeks in the Cake Jeanie studio! I'm loving the last few cakes that I've made.The Porsche cake was particularly challenging. I found it just a bit tricky to make a Porsche out of a whole block of sugarpaste, molding and shaping as I went along. My customer was pretty happy with the result. I even added a personalised number plate for hte birthday boy which they were pleased about! The Porsche logo was also fiddly but looked really good when done.

I added red, black and yellow ribbon on the side of the cake because it looked a bit bare when left white.

The gaelic football cake had a tricky goalpost. I first made the net out of piped cake lace. I left it overnight to dry on parchment paper and it peeled off the next day. Next time I will make the cake lace much thicker to get thinner and a more net-like effect but what I got wasn't bad at all! 

I also made the frame of the goal post in advance- the frame that sat behind the plastic goal posts that were made out of cake dowels. When everything was dry and ready to go on the cake, I first placed the plastic cake dowels into the cake, using a template to get the distance right. I then cut a cake dowel to a length that would span the distance between teh two, and measured the height (the height of the D shaped frame), then attached this piece of dowel with white florist tape. This was quite difficult because I was trying not to move the dowels in the cake.Then I placed the D shaped frame behind the dowels, using royal icing to glue it on. Once the frame was in place and the royal icing was dry, I cut pieces of net, using templates to get the right size, and glued on with royal icing. 

The kitten cake was my daughter's request. She wanted to be surprised, but because she's only 7, couldn't resist continually coming into the kitchen to have a peek. I just about managed to keep her from seeing it until her birthday. The kitten cake was almost straightforward. The design is from a book by Debbie Brown. I had lost my large circle attachment for my sugar gun, so I had to use my semi circle. There are lots of semi circular strands of sugar on this cake! The kitten was pretty easy to make, and so was the cake board wood effect, which I've done quite a few times. I just cover the board with sugarpaste, use a ruler to make a row of long lines (using the ruler as a guide for the width), and using the short end of the ruler to make smaller lines perpendicular to the long lines. Then I use the dresden tool to score the planks of wood, then paint with a mixture of ivory and brown.

George Pig and Shopkins were fun to make too. They both looked very cute in the end. The name of the birthday girl on the Shopkins cake was made based on the Shopkins logo, and handpainted (except for the name itself) onto the sugarpaste. 

Next up, the Paw Patrol Cake!

Monday, 19 October 2015

Woop! New Cake Decorating Class

Would you like to learn how to make this beauty?


Now's your chance!

In this 4 hour class, you will learn the following:

- fill and ice a cake with buttercream, achieving straight sides and a smooth flat top.
- cover the cake with sugarpaste and get a smooth finish.
- decorate the cake with flowers, fruit, leaves, and a plaque with your name
- cover the cake board
- finish the cake and cake board with ribbon.

I have vegan and gluten free cakes available on request. The gluten free cakes are not suitable for those who have a severe allergy to gluten, for example, coeliacs. The cakes are made with gluten free products, but the tools and equipment I use regularly come into contact with gluten.

Go to www.cake-jeanie.co.uk for more information and to book your class!

x Jean

Saturday, 3 October 2015

Cupcake Decorating Class - Open for Business!

So I had my first cupcake decorating class. It was masses of fun, and the students had a great time too - bonus, yes? Here's a few pictures as proof that I did not make anyone cry that lovely sunny day...


There was even some laughter at one point!


See? Smiles all around! That's me in the back in the photo above :)

After getting everyone settled, as you do, with tea/coffee/juice (see? I'm so nice I won't let anyone get thirsty in my house!), we worked on getting flat and domed buttercreamed cupcakes...


 Then the really fun part started!


The class overran by quite a bit- the sugar flower took a while, but we got there in the end! Here's some cupcakes that were created that day, beautiful aren't they?


Sugar happiness is in sight, just join my class! To book a class (held in Wilmslow, Cheshire) go to www.cake-jeanie.co.uk and click on classes.

I will be adding other classes to the timetable in future- a beginner cake decorating class, a cake painting class, and figure making class. I hope to be very very busy in future!

x Jean

Mermaids, Medals and More


I've not had time to blog recently. Been busy with cakes and preparing for my first cupcake decorating class (I'll write about it in the next blog!).

I had great fun with these recent cakes. Was very excited about a mermaid cake order. Been wanting to make a mermaid for yonks. Then I got a Star Wars order too- I was very keen to make a galaxy/space background for the cake and cake board. It's fantastic fun splattering white paint (mixed with pearl for some sheen) onto pink, purple, blue & black spray painted background! And the construction cake- turning Oreos into 'soil' is really hard work, I kid you not. It was very very difficult not to eat the 'soil'.... But I digress...

The gymnast and construction themed cakes were good fun too. I thought it was sheer geniusness on my part to make the business logo (Inspired Gymnastics) into a gold medal. It was very tricky business making this gold medal:


First I rolled some yellow fondant and let it dry until it was 'leathery'. While that was drying, I printed out and cut the templates for the figures. When the fondant was dry enough I put the template on top and started cutting with my uber sharp craft knife. As you can see from the photo, the leg of the figure on the right broke. But all good as you can see, it's attached! I also cut the letters with my letter cutter and let those dry for a bit. The circular disc was ready and dry, so when the letters and figures were dry enough to be handled, I placed them onto the disc and glued them on. When all dry and firmly stuck to the disc, I painted on some gold luster. Wella! We have ourselves a gold medal made out of sugar :)

Have a fun day everyone!

Monday, 14 September 2015

A Lovely Wedding Fair


I had the most enjoyable day at a wedding fair at the Hilltop Country House in Prestbury yesterday. The event was organised by Brides Up North, who are pretty great at what they do! It was a very busy day, with brides and grooms coming and trying out my cakes and discussing their cake designs. Hopefully I get to meet them all again for a consultation! I was very very tired afterwards and was half asleep on the sofa at 5.30pm :O :D

Friday, 28 August 2015

Little Girl's Cakes


I had the honour of making some special cakes lately: a christening cake for Lucy Isabelle, and a princess carriage cake for Paige.

Both cakes were a joy to make. I loved the sugar baby booties I made for Lucy (see photo above). They're just the sweetest.

The carriage cake was fairly straightforward, though I did have to figure out how to get the carriage to look like it's off the ground. It's resting on a thick disc of fondant, topped with a rectangular piece of white fondant, and the cake on top of this. Nearly everything on the cake was handmade without molds except for the tiny flowers and the pearls surrounding the door. Truly bespoke!

Tuesday, 21 July 2015

Netball Cake


Yes, it's cake! A commission for a netball cake got me quite excited to make another spherical cake. I had quite grand plans for the cake but due to lack of time ended up simplifying the design to just the cake and the floor boards.

The netball is 'handstitched' with tiny holes created by using a cake tool. I could have used an actual stitching tool but from photos of netballs I'd seen, the stitches looked quite prominent so decided to make them individually. The ball is dusted with silver grey to give it dimension and an aged look (but not too aged!). The floorboards were embossed and handpainted then finished off with 'nails' which were created using a small round piping tip.

The Frog Prince Selfie


My frog prince cupcake topper couldn't resist taking a sneaky selfie on my phone! Here he is with all the other froggies and some crowns sat on plum purple satin cushions. Chocolate cupcakes with vanilla buttercream- seems a popular flavour combination these days!

Next post: The Netball Cake!

Thank You Teacher Cupcakes


It's that time of year again when teachers say goodbye to the kids and the kids give them presents. A teacher was the lucky recipient of these cupcakes, complete with tiny apples and books. Chocolate cupcakes with vanilla buttercream.

:)

Friday, 26 June 2015

The Bird on a Tree Stump


I was a bit stumped (har har) for ideas for a theme for my friend's birthday cake. The tree stump cake was on my list of 'cake themes to do' so I thought it fitting for a nature lover! The cake is vanilla sponge with French buttercream and covered in chocolate ganache. 

The top of the stump is handpainted, The rest is made with sugarpaste. The bark of the tree was created by hand with my modelling tools. I added the holes to give a lot more texture, interest and realism. 

The bird is modelled out of sugarpaste, and attached to wooden skewers. All in all, a cute cake and my friend loved it :)

Monday, 8 June 2015

50th and Baby Blue


There's a lovely story behind this cake :)

A lovely girl rang me up asking if I had time to make her mum's birthday cake, which was a week away and I said yes I did. I set about making the flowers first so they had time to dry.

A few days later a friend of mine visited to say she was going out at the weekend for her friend's 50th. I have met my friend's friend before, and had a rough idea where she lived (somewhere across from my friend). Can you see where this story is going? Now I didn't make the connection because up to this point, I hadn't been told where to deliver the cake. Even when I did get the address, my only thought was, hey that's near my friend's house! DUH.

It was only shortly after I delivered that I remembered about my friend telling me about the weekend birthday bash, and with the location of the house, I finally put two and two together. I rang my friend just to be sure and she confirmed it all.

So it turns out, I've made a cake for someone I know, and I didn't know it! What a lovely small world!

A Pink and Ivory Wedding Cake


Pink and ivory - cannot go wrong with these colours! They are just perfect together. Combine with pearls and flowers and you have a very vintage feel to the design, just the way this lovely wedding cake turned out.

I practiced a bit with the pearls before decorating the cake with it. I'd had problems with my pearl mold before. With a liberal dusting of cornflour, and freezing the molds (with the sugarpaste in it) for at least 15 minutes each time, the pearls came out perfectly and were a doddle to place on the cake. Only thing was, I had to do this rather a lot as I only had one pearl mold :)

The flowers turned out better than I thought too, and came out beautifully once placed on the top tier. I was wondering whether to place a posy pick into the cake or make a little dome and insert the flowers and leaves into that. In the end, I decided I didn't want to place a posy pick into the top tier (which was a little 4" fruit cake), and opted for the little dome instead.

The middle and bottom tiers are chocolate orange cake with chocolate orange ganache- quite rich but really suitable for a wedding where the cake slices are on the small side. I grated A LOT of fresh orange for this cake!

My bride (well I don't own her but you know what I mean!!) was really happy with it, exactly how she wanted it to look! Now that's made my day :)

Happy caking, folks x

Sunday, 31 May 2015

17 And Mad About Marvel


My eldest is 17!! How did that happen??

Nicola (the one turning 17 and pictured above cutting her cake, with little sis looking on) asked for a Captain America, Winter Soldier themed cake, with emphasis on Winter Soldier. She asked for vanilla cake with chocolate orange ganache. We've been a bit mad about chocolate orange ganache ever since we tried it a few months ago. We tried both chocolate ganache with fresh orange rind, and ganache made with Terry's chocolate orange. The ganache with the fresh orange rind won hands down! 

We both started browsing the images of the comics for inspiration, and originally I was going to have both Captain America and the Winter Soldier on the cake, but in the end an image of the Winter Soldier captured both our imaginations. It's in black and white (and a tiny bit of red): 


Because of the image, instead of a round cake, I decided to go for a rectangular cake. I printed the image off, put tracing paper over it and traced the image, then when the cake was covered in sugarpaste and ready, I placed the image pencil side onto the cake and traced over the image with a pencil. The image, as you can see, is very detailed, so I did leave out quite a few details. Also the cake wasn't wide enough so most of the soldier's backside isn't seen on the cake. More's the pity.

Painting the image was a painstaking task. The pencil outline wasn't that clear. I used a black food pen to try and get more of an outline, using the printed image as a guide.Then with a small brush and a mixture of black dust and confectioner's glaze as paint, I painted the shadows on bit by little bit. 

I asked Nicola if she'd like a quote from the movie included on the cake as well, and she immediately said 'Who the Hell is Bucky?' (the Winter Soldier IS Bucky). 

Lastly, I made Nicola's name and age with black gumpaste. I downloaded the Captain America font, typed Nicola's name and age in word using this font, printed it out then cut out the individual letters and numbers. I rolled the gumpaste to the required thickness and let it set for about 20mins. After the gumpaste set, I put trex on the gumpaste so that the letters would stay in place, placed the letters on top and cut out with a craft knife. This is never an easy task especially when curves are involved, but I managed!

Happy birthday to a wonderful daughter... I love ya x