I have been asked this question a few times lately. I thought I would blog about it to give people an idea what goes into cake making and the amount of work involved!
After obsessing and finalising the cake design weeks in advance, I generally start with my cakes up to two weeks before they are required. I start making the gumpaste models first. The first reason for this is gumpaste needs time to dry- the time depends on the thickness of the gumpaste. The second reason is that some models are made in stages (I'll get into that in a moment). The third reason is that it's best to make the models in advance so that if there is a lot to do, I have plenty of time to finish what has to be done later on.
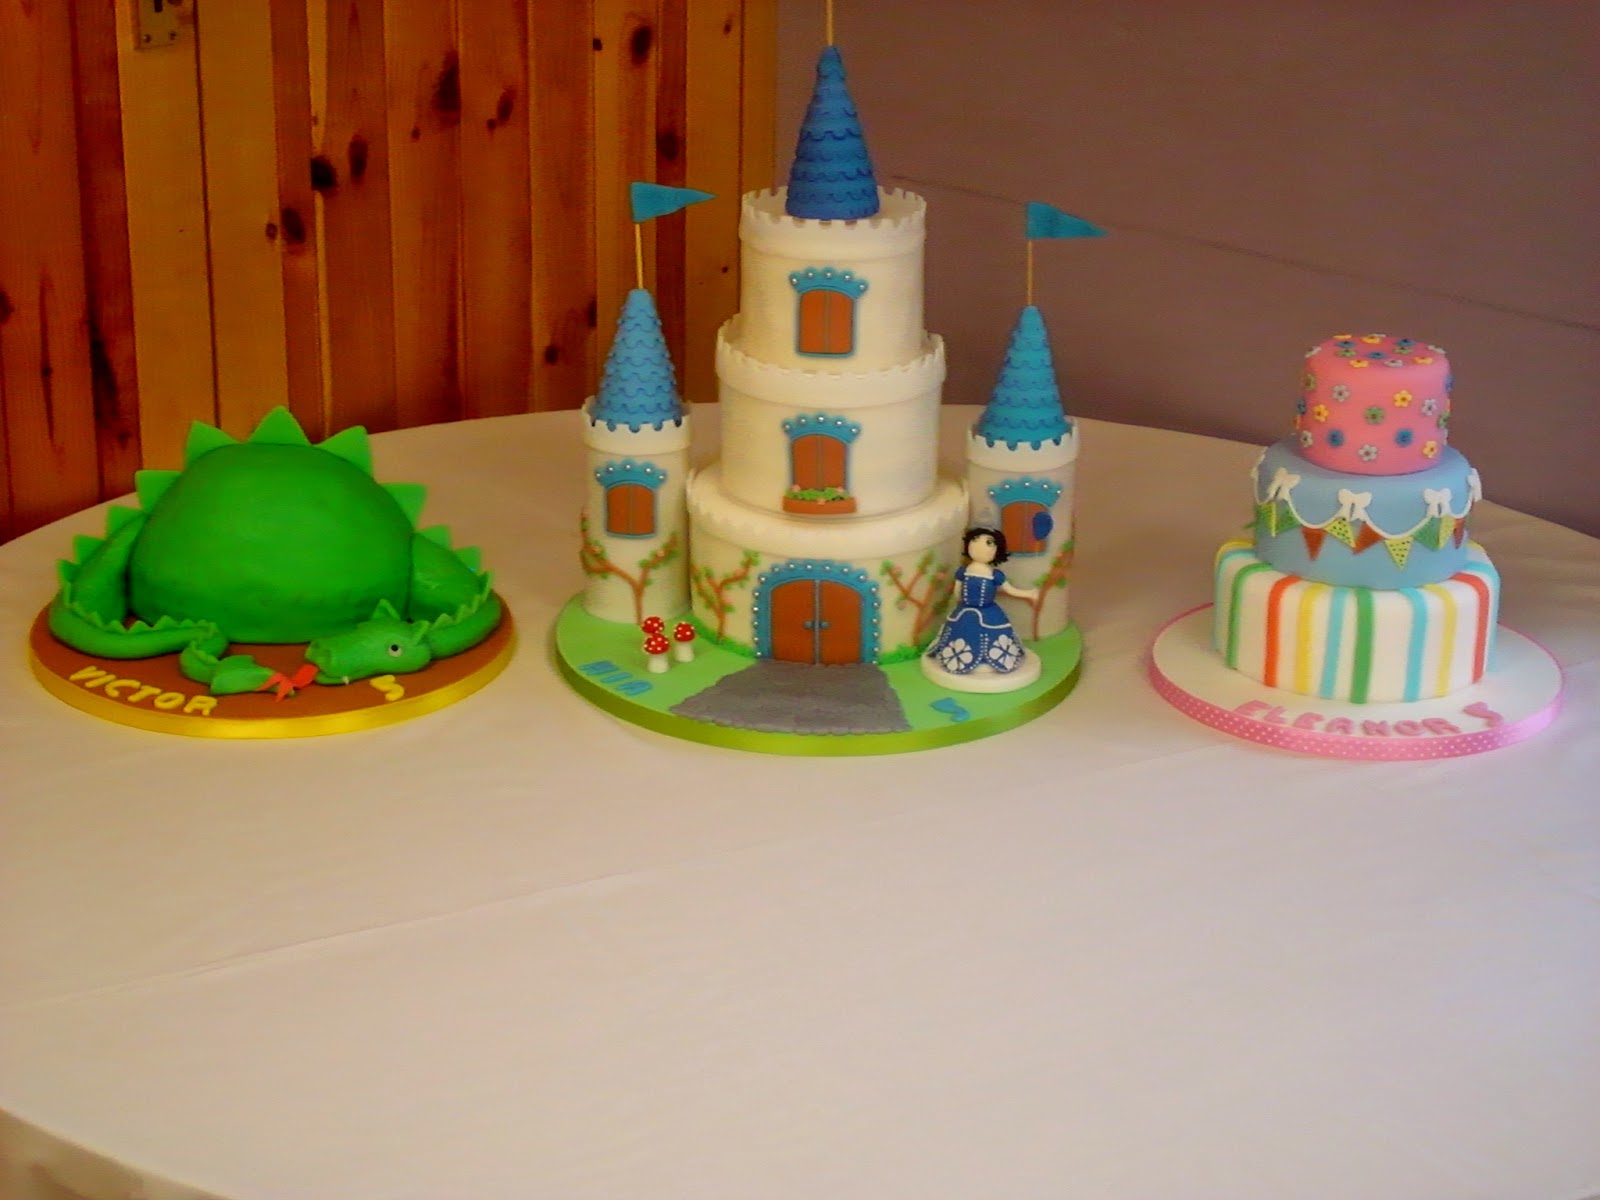
Some models are straightforward and fairly easy and are quick to make, others are very difficult and take a long time. Some are made over two days or more. For the princess cake topper I made for the
castle cake recently I started off with the dress part of the gown which I shaped and allowed to dry overnight. I also made the head at the same time- I rolled up a ball of flesh coloured fondant and left it to dry. The next day the dress was layered with the purple part of the dress, then the body, neck and shoulders and dress sleeves were added on top of the gown and again, dried overnight. The reason there is a lot of drying involved in this process is so that when you come to put parts together, the gumpaste is not dented or marked in any way. I made the arm holding the balloon in advance too so that the hand would set hard while holding the balloon (which was made and allowed to dry before the arm was made!). I can easily ramble on in detail on this topic, but you get the idea...!
Making cake toppers is only the tip of the iceberg as they say. There are so many ways to decorate a cake I can only rattle off some examples: Flowers (2D and 3D), stripes, ruffles, lace, brush embroidery, rice krispie treats, modelling chocolate, edible dusts, metallic spray, pearl spray, royal icing transfers, carved cakes (bags, dragons, etc), stencils, and so on and so forth.
I bake my cakes a few days before they are required. After cakes are baked, they have to cool completely before torting (cutting each cake into two layers- all my cakes have 4 layers in them). After that they are filled with buttercream on a cake board (each cake sits on a cake board of its own- they are thin boards about 2mm thick). Then it is crumb coated with buttercream. Crumb coating is a very thin buttercream coat on a cake which helps stop crumbs from getting onto the final coat of buttercream. The cake is then settled (getting out any air pockets in a cake)- either leaving it for several hours with a weight on top (a thick book, for instance, which is placed on top of parchment paper on top of a cake), allowed to settle on its own overnight or 'squished'. To squish a cake, place parchment paper on the cake and on top of this a cake board or something flat that won't bend, then pressing down on the cake quite hard to release any trapped air. Air pockets are what create bulges in cakes- google cake bulging and you'll see what I mean.
After settling, the cake is placed in the fridge for the buttercream to set. This makes it easier to coat with the final layer of buttercream. I work hard to make this layer as straight down the sides as possible using a dough slicer and as flat and even at the top using an offset spatula. I have a lazy susan I use to make this job easier as well. I just turn the lazy susan with the cake on top and go around it many times with the dough slicer until the sides are perfectly straight and smooth. The lazy susan is just as handy for levelling the top as well!
This stage alone from baking the cakes to the final coat of buttercream can take several hours!
Next comes covering the cake in fondant. You'd be surprised how much fondant is needed to cover cakes! Because I like my fondant to be 4mm thick, I require 850 grams of fondant for an 8" cake! That is a lot of weight on top of a cake which makes settling a cake a vital part of the process. First I knead the fondant. Because I am petite (5'3") I stand on a stool to make kneading on a kitchen counter easier for me. Then I colour the fondant- this can take a while depending on the colour I am trying to achieve. This means a lot more kneading! When the fondant is ready, I start rolling it out on the counter dusted with cornflour. To know how big to roll out the fondant- you add the diameter of the cake (for example, 8") to twice the sides (say the side is 4" high x 2 = 8") and that makes 16" diameter in total. Big right? I use my stool for this bit as well because you need quite a bit of pressure to get that fondant rolled properly. Mustn't forget to mention I have to make sure the fondant doesn't stick to the counter! It can be quite disheartening to have all the effort of rolling the fondant out to the size you want, only to find it sticking to the counter! Unfortunately the only solution to this is to start all over again.
I have to make sure I don't overwork the fondant. The fondant must also not be left to dry. Any time the fondant has to be left for a few minutes or longer, I have to cover it in clingfilm.
Where was I? Oh yes...I take the cake out of the fridge. I place the fondant on the rolling pin and gently ease it over the cake. First I smooth out the top of the cake with a cake smoother, then start working on the sides an inch or so at a time all around using my hands. So: smooth an inch all around, then the next inch- smooth all around and so on until I reach the bottom. I cut the excess fondant off with a pizza cutter and start smoothing all around with either a cake smoother or a ball of fondant. I go around the cake several times to get out any and all bumpy bits.
If the cakes are for a tiered cake, I dowel the cakes to prevent movement and to support the cake that will be placed on top. I like to use thick sturdy straws! Insert straw, mark it to the same level as the top of the cake, lift straw out, cut straw, insert straw again. Repeat for succeeding straws. For my
house cake, apart from the straw dowels, I had a wooden dowel in the centre of the cake. The centre dowel provides additional support for very tall cakes. If using a centre dowel to go through all the cakes, I have to cut holes in the centre of all the cake boards. In my case, I will centre dowel any cakes with two tiers or more.
A few days before the cake is placed on the cake drum (These are very thick boards- about 1/2" thick), I cover the drum in fondant and leave to dry. Again, because the fondant is allowed to dry and set, whenever the cake drum is moved or a cake placed on top, I don't mark or dent the fondant.
Depending on the type of decoration, I will decorate a cake either before it is placed on the cake drum (more usually), or afterwards (rarely). The
painted roses cake I made in February required the cake to be decorated before being placed on the drum. I had to be close to the cake to be able to paint it. For the
Castle cake, I decorated the cake tiers after they were placed and stacked on the cake drum.
I make the letters and numbers out of gumpaste. As these are relatively thin I can make them on the day the cake will be finished or usually, several days ahead. These are the very last things I place on the cake but the very last decorative feature added is the matching ribbon all around the sides of the cake drum which really finish off the whole look of a cake.
I then place the cake in the box for transportation or pick up. If I am transporting the cake myself, I sweat and stress about the journey. I drive as slowly as possible (40mph zone? forget it! I'll do 28mph tops). When I am transporting a cake, I have a particular fear/loathing of potholes in the road. Suddenly, there seem so many! If a customer is picking up the cake, I give instructions about how to drive with a cake in the car ("drive slowly, take bends slowly, no hard braking" I scream), and then sweat and stress about the cake after it is taken away from me.
I haven't said everything that needs to be said about making cakes- there's far too much to go into detail about. But hopefully I've said enough to make it interesting and informative :)
Having told you all the blood and sweat involved, I have to stress that I do enjoy making and decorating cakes. I get a lot of joy in creating something that looks and tastes fabulous. I love to wow and surprise people with fantastic cake designs!
And there you have it, how to make cakes. The end.