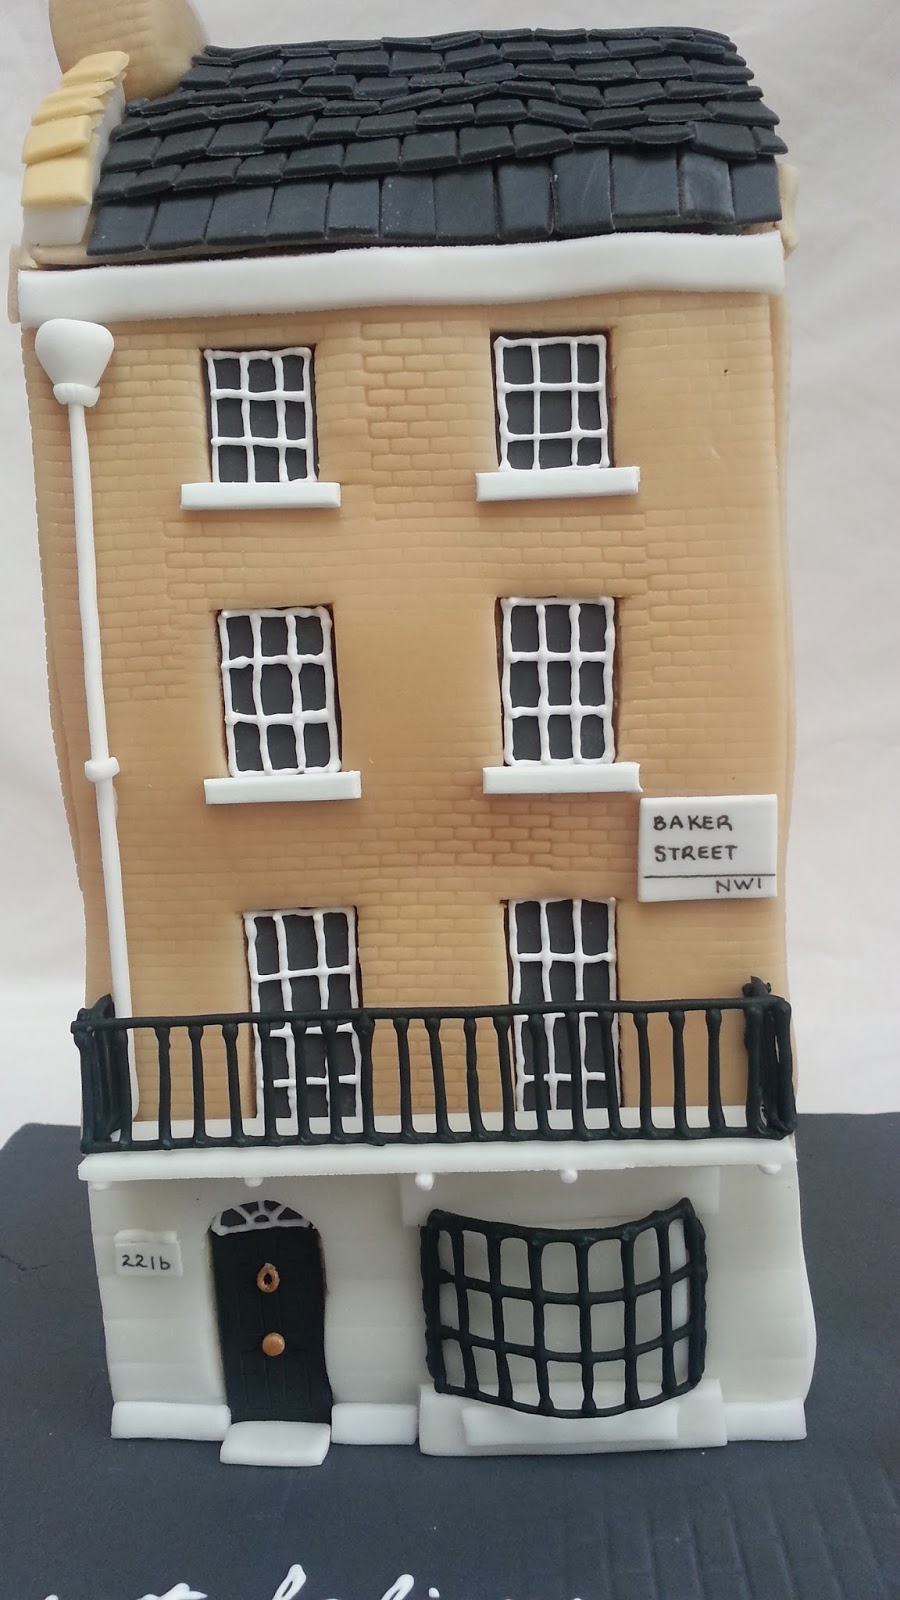
This is the cake I made for a Bat Mitsvah last weekend. I wanted to share how I went about making the cake as this was a pretty unique cake to make and I think it might interest cake decorators and customers alike in what goes into making a very detailed and complicated cake. The theme of the cake is 'Sherlock Holmes' and I was given free reign on the design. I decided on the Sherlock Holmes house- his apartment at 221b Baker Street in London, which is now a Sherlock Holmes Museum. I used an image a friend of mine found on the internet of the house as a bookend to be able to get a good idea of scale and the details of the house.

The cake was baked in a 10x10" pan. After baking, I cut the cake into 4 quarters. Each quarter was then cut horizontally to create 8 little cakes in total. I cut holes half an inch in diameter in the middle of two cake boards. I then filled 4 layers of cake on each of the two cake boards, dowelled them with 4 straws each then stacked them and then crumb coated all over. I then had quite a tall cake. After a final coat, I had a 5" wide, 5" deep and 9" high cake! Sorry the pictures below are so hazy. I'd smeared the camera with a bit of buttercream and thought the problem was with my phone camera!
I now had a good idea of how tall the house was going to be up to the point where the roof begins. I then made a sketch of the house in the actual size it had to be so that I could make templates of the windows, doors and other features:
The cake is quite narrow and tall so it was pretty unstable (top heavy). The hubby very kindly screwed on the cake dowel onto the cake board so that the cake wouldn't move around/fall over. I covered the board in fondant, then asked a friend to help me place the cake onto the dowel.
I then proceeded to make the majority of the details in advance. It was an enjoyable but time consuming process as there were lots of tiny bits of detail. I do not have photos of the balcony because I forgot, but I basically made a strip of gumpaste 1" by 5" long and about 3mm thick. I then glued some cocktail sticks onto it with little strips of similar coloured gumpaste over it to keep it in place. I used 3 cocktail sticks, one on either end and one in the middle. I let that dry for 48hrs.When I did place the balcony on the cake, it was very sturdy and I knew it wouldn't move about! I then went on to make the following details:
 |
| . |
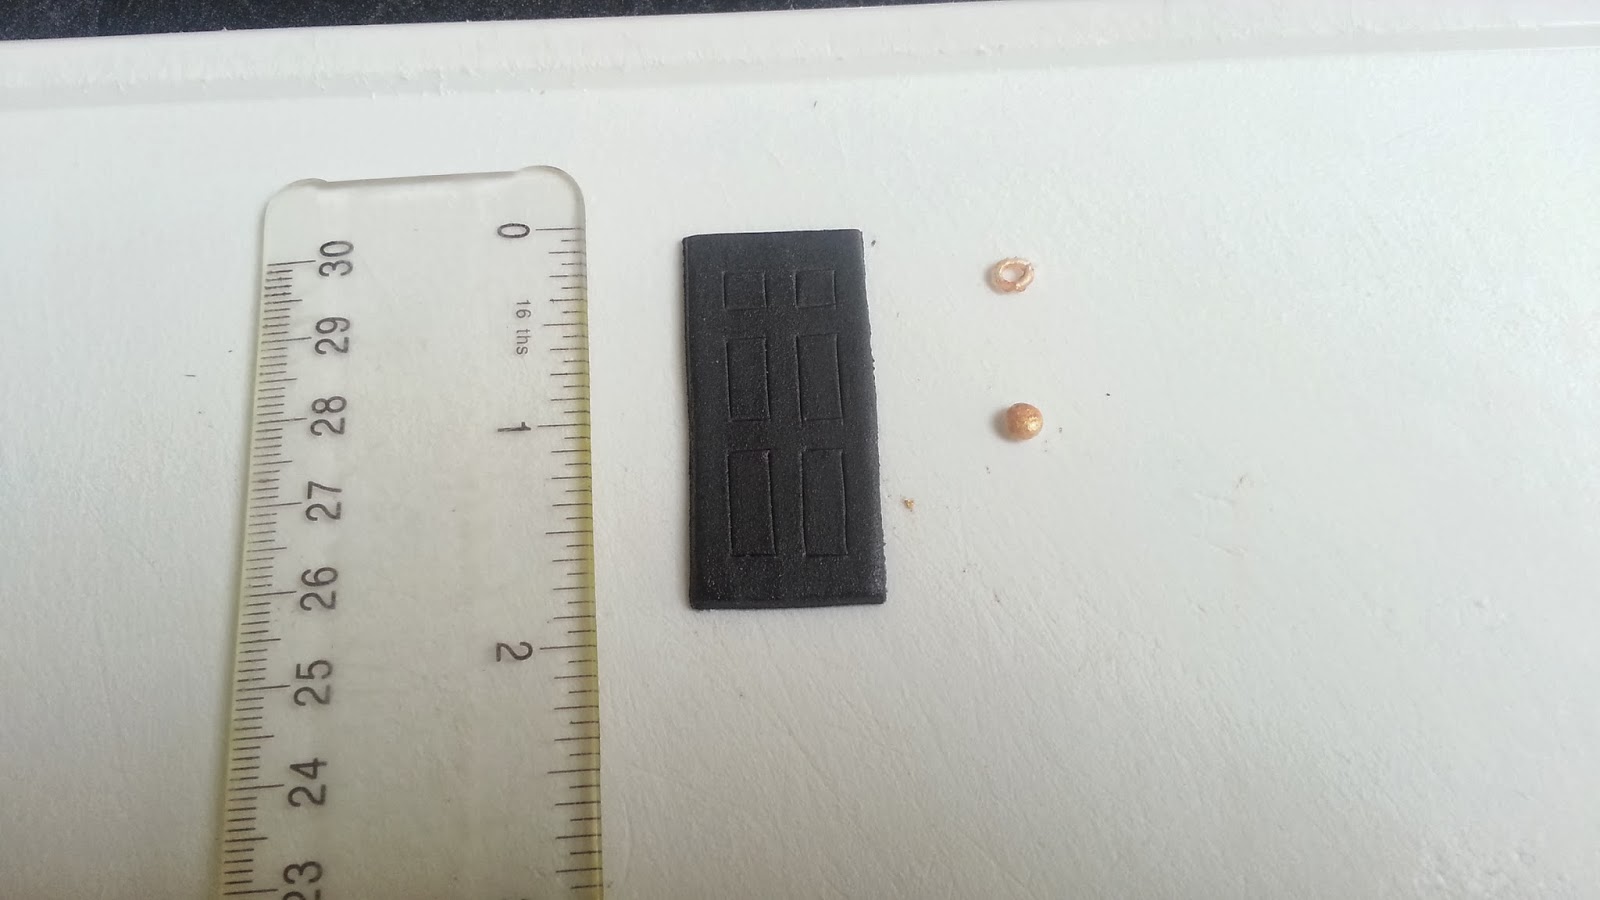
The first thing I did was place the walls on the cake. I cut the walls to size and 'stamped' them with a miniature brick impressions all over. I placed each wall panel on parchment paper smeared with shortening (right side face down onto the parchment paper). I used the parchment paper to help me place the walls on the cake, otherwise the panels would have flopped about everywhere. When the walls were up and using the window and door templates, I proceeded to cut out the spaces for the windows and doors (there is one in the back as well as the front!). Then I placed the premade windows and doors you saw above into their little niches. I did this because I wanted the windows and doors to look as recessed as they are in reality (if that makes sense).


Here are some photos of the roof. I couldn't see from google images what the roof was made of, but from the grainy images I thought the roof was most likely slate and so that is what I placed on the roof. Each tile was individually cut and glued onto the roof!
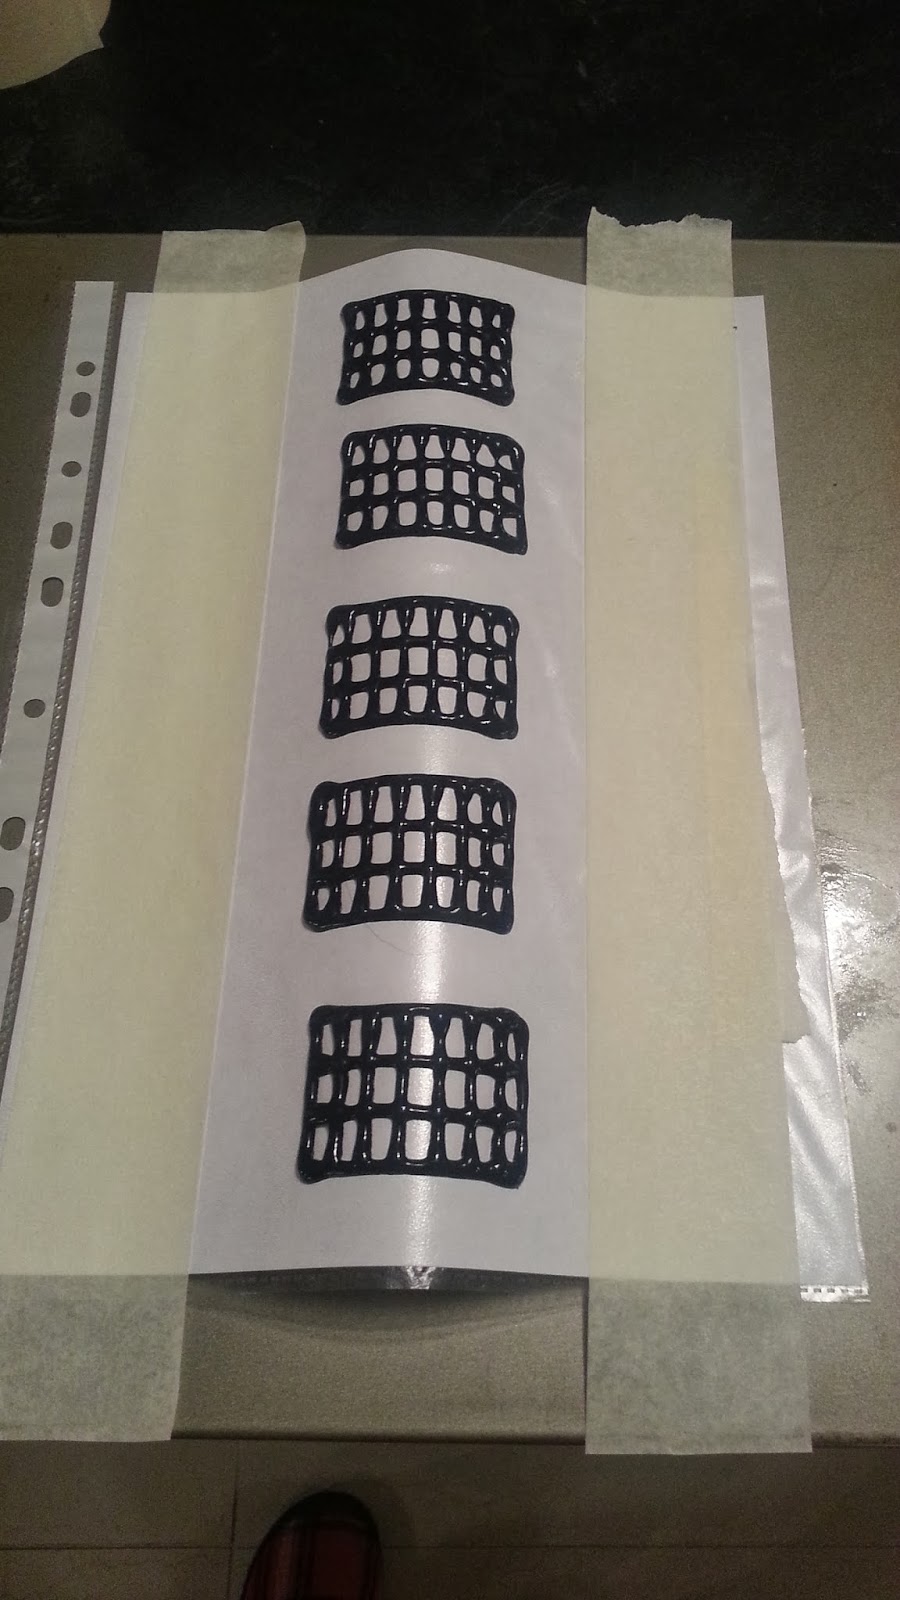
Here are some photos of the balcony railings and curved bay window that I had done in royal icing. Actually these images are of the first batch I made. I wasn't happy with this batch because they looked too big and bulky for the size of the house. I made a new batch of royal icing and made it much stiffer this time so that they would come out in finer detail. I printed out the images I wanted to pipe and placed them in plastic jackets. I cleaned the plastic jackets and applied shortening to stop the piping transfers from sticking. For the bay windows, after piping, I placed half of the cardboard tube from a roll of kitchen paper towel and placed it under the jacket so that the windows would dry in a curved shape.
Lastly, I printed out the letters in the Sherlock Holmes font:
However, the font is quite rough and I had a feeling that I would not be able to imitate the font exactly when piping with royal icing. Also in the end, the royal icing transfers kept breaking because the letters were so fine and I ended up taking the paper out of the plastic jacket, placing it directly onto the cake, tracing the letters onto the fondant covered board with a sharp pencil, and then piping directly onto the traced letters on the fondant covered board. All this because I wanted all the words to be straight and spaced evenly. I think I will apply this technique on any cake with a lot of text that requires piping rather than making royal icing letter transfers!
The cake is made of chocolate with vanilla buttercream. It is 5 inches wide, 5 inches deep, and about 12 inches high. The roof is made of Rice Krispie treats (Rice Krispies with melted marshmallows and butter). It is all made with fondant and gumpaste and the Window frames and balcony railing are made of royal icing. The fondant covering on the cake board is all cracked because I wanted it to look rough like real pavements are. I added a brick impression on it to make it look like a cobbled street.
The cake took several days to complete. At a rough guess, I think it would have taken me 30 hours in total to do!
I hope you enjoyed reading about the Making of a House Cake!